Equipment for Turkey on the Charcoal Grill: - Charcoal Grill (I used the STOK® Drum) - Chimney Coal Starter (I used the STOK Rapid Charcoal Starter) - A meat thermometer (I used a Thermapen®) - A large roasting pan - A foil-covered cookie sheet - Disposable aluminum roasting pan - 2 sets of oven mitts or pot holders - a good-sized, non-melting surface near the grill (such as a wood or wrought-iron table) - Pair of long grilling tongs
Thawing: For a frozen Turkey, thaw 1 day per 4 lbs. (15-16 lb. Turkey = 4 days in the fridge) Brining: Check your turkey packaging to determine if the bird has already been brined. The package will say something like "Up to 10% solution added to increase moisture", or anything to indicate that something's been done to it. If your Turkey has not been pre-brined, plan on an extra day of prep for brining.
Remove thawed Turkey from refrigerator and allow it rest at room temperature for about 2 hours (any meat cooks best at room-temp).
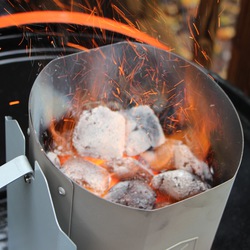
Depending on your method of charcoal-prep, you may choose to start your coals just before you start Turkey prep. If possible, avoid lighter-fluid methods for starting coals. It's just better to go au naturel! (Plan to fill the chimney completely for the initial heating process.)
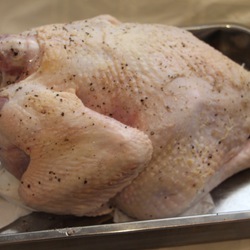
Rub turkey down with Olive Oil, then rub generously all over with fresh ground pepper and salt. (*tip: rub the inside cavity with salt too.) Following a tip, I cut some of the skin around the drumsticks, allowing the legs to splay out a bit. Rumor is, dark meat tends to take longer to cook while the white meat can become overdone/dry. Opening the legs was supposed to even out the cooking process. It really worked! Turkey can rest while you prepare the charcoal grill and equipment.
Equipment Prep: Place the foil-covered cookie sheet, the roasting pan and the mitts near the grill, and make sure you have your non-meltable surface ready to hold the hot grates when it's time to refresh the coals. Have your meat thermometer near by, too.
Grill Prep: This recipe calls for indirect heat. Remove the grill grates, and place the disposable foil pan to one side of the grill. The pan catches the drippings, making clean up easier. Pour the full chimney of cook-ready coals on the other side. Cover, and make sure the internal heat reaches about 400 degrees Fahrenheit.
Place the Turkey on the grill to the side, over the pan. Breast side down (you will flip it in about an hour). Cover the grill, and note the time.
30 minutes later: check the grill heat. It should still be close to 400. Allow it to continue cooking and get another batch of charcoal going. This time, only use about 1/2 a chimney full. You can set the chimney on the foil-covered cookie sheet while it heats.
50-60 minutes later: Check heat. It's probably time to freshen up the coals. Using mitts, carefully lift the turkey to the roasting pan, and measure the temp at the thickest part of the thigh and breast. (Goal is 165!) With the other set of mitts, carefully remove the hot grates and lay on a melt-proof surface. Using the tongs, make room for new coals and slowly pour them in. Carefully replace the grates. Move the turkey back to the grill, and lay it back down breast-side up. Close grill.
30 minutes later: Make sure temp is still around 400, and get another 1/2 chimney of coal going. 50-60 minutes later: Check heat. Repeat coal-refresh when grill heat begins to drop. It's good idea to check the Turkey temp again (it's been cooking for nearly 2 hours).
Continue this process of heat monitoring and coal refreshing until your bird reaches 165 F.
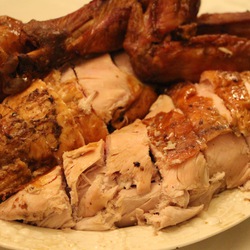
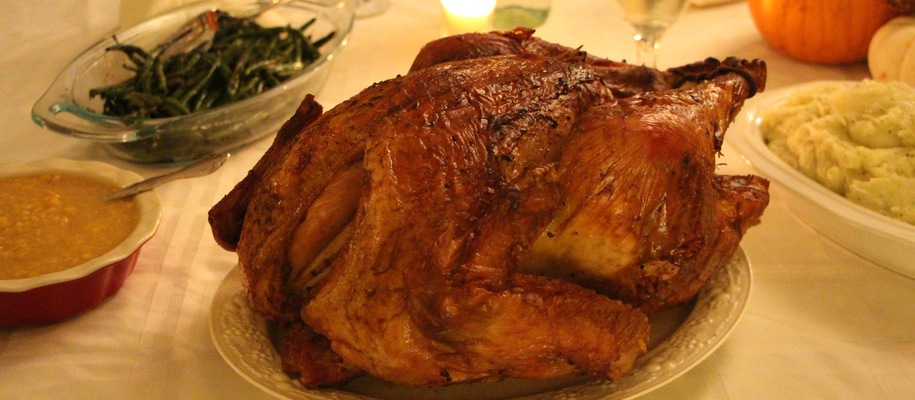
When 165 F has been reached, remove the turkey and allow it to rest at least 15 minutes before carving. Then, get ready to enjoy the juiciest, most flavorful Turkey you ever had!